✅ Last checked on
What if you could control every device in your house without relying on the cloud? Imagine lights, sensors, and appliances working seamlessly together—no monthly fees or privacy risks. This guide shows you how to create a self-sufficient automation setup that puts you back in charge.
Traditional systems often lock you into brand-specific hubs or unstable internet connections. By pairing a compact computer with energy-efficient wireless protocols, you’ll bridge devices from Philips Hue to generic sensors into one unified network. No more juggling apps or worrying about outages.
You’ll use open-source tools like Zigbee2MQTT to connect low-power gadgets directly to your local server. This approach cuts through the clutter of proprietary ecosystems while keeping data offline. We’ll walk through hardware choices, firmware tweaks, and platform integrations—all designed for reliability.
Key Takeaways
- Combine affordable hardware with specialized protocols for full offline control
- Eliminate dependency on cloud services and subscription fees
- Integrate devices from multiple brands into a single dashboard
- Optimize energy use with low-power communication standards
- Apply step-by-step configuration tips for security and stability
Ready to transform your living space into a truly independent smart environment? Let’s dive into the tools and techniques that make it possible.
Understanding the Smart Home Landscape
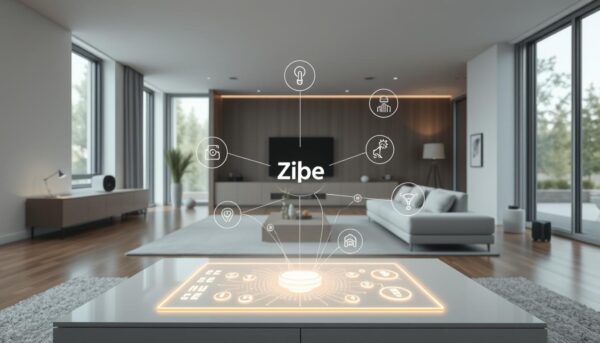
Navigating the maze of connected devices requires understanding their communication backbone. Modern ecosystems rely on wireless protocols like Zigbee and Z-Wave to link sensors, switches, and controllers. These technologies form invisible networks that let gadgets collaborate without cloud dependency.

The Role of Zigbee in IoT and Home Automation
Zigbee excels in low-power scenarios, making it ideal for battery-operated gadgets like door sensors. Its mesh network design allows devices to relay signals, expanding coverage without extra hardware. Compared to Z-Wave, Zigbee supports:
- Lower latency for instant responses (under 30ms)
- Larger networks (up to 65,000 nodes)
- Open standardization across brands
Proprietary bridges from companies like Philips Hue often limit cross-brand compatibility. A unified system bypasses these restrictions, as shown in this smart home hub comparison.
Raspberry Pi as a Versatile Automation Hub
This credit-card-sized computer transforms into a central command station. Unlike closed ecosystems, it integrates Zigbee adapters, Z-Wave sticks, and Wi-Fi devices through open-source software. Benefits include:
- Local processing for instant commands
- Support for multiple protocols simultaneously
- Custom automation rules without subscription fees
By combining energy-efficient communication with flexible hardware, you eliminate the need for separate hubs while maintaining 24/7 reliability.
Getting Started with raspberry pi smart home zigbee
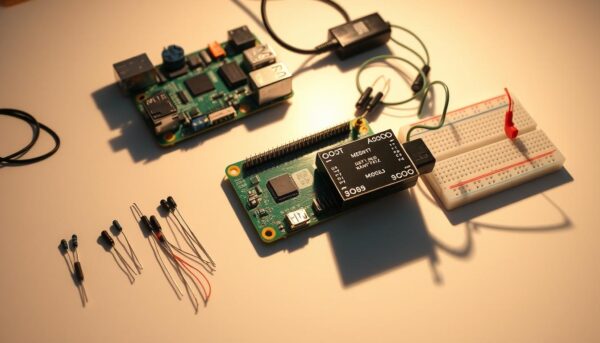
Creating a self-contained network starts with selecting reliable components. You’ll need specific tools to establish communication between gadgets while keeping operations local. Focus on compatibility and energy efficiency during assembly.
Essential Hardware You’ll Need
| Component | Purpose | Key Specs |
|---|---|---|
| Single-board Computer | Central processing unit | 4GB RAM, 32GB storage |
| Wireless USB Adapter | Protocol communication | CC2652 chipset |
| Stable Power Supply | Continuous operation | 5V/3A output |

Initial Software Setup and Installation
Begin by updating your system using sudo apt-get update && sudo apt-get upgrade. Install Node.js version 14 or higher to support the control software. These steps prepare your environment for device management.
Flash your adapter’s firmware using manufacturer guidelines. Edit the configuration YAML file to specify port addresses and network keys. Start the service with sudo systemctl start zigbee2mqtt to enable communication.
Proper integration ensures all parts work cohesively. Test signal strength between components to optimize placement. This attention to detail prevents connectivity gaps in larger spaces.
Configuring Your Offline Smart Home Setup
Perfecting your self-reliant setup requires precise adjustments to communication channels and software interactions. Focus on bridging devices through standardized protocols while maintaining airtight security measures.
Universal Bridge Implementation
Start by linking your control dashboard to the wireless adapter. Open Home Assistant’s configuration.yaml file and add these lines:
mqtt:
  broker: 127.0.0.1
zigbee2mqtt:
  serial:
    port: /dev/ttyUSB0
This connects your USB dongle to the MQTT broker. Use sudo systemctl restart home-assistant to apply changes. Pair new gadgets by enabling permit_join: true for 5 minutes max—disable immediately after adding devices.
Automated Service Management
Create persistent background processes using systemd. Save this configuration as /etc/systemd/system/zigbee2mqtt.service:
| Parameter | Value | Purpose |
|---|---|---|
| ExecStart | /usr/bin/npm start | Launch service |
| Restart | always | Crash recovery |
| User | pi | Permissions |
Activate with sudo systemctl enable zigbee2mqtt. Update packages using sudo apt-get upgrade monthly to patch vulnerabilities. This combination ensures 24/7 operation without manual intervention.
Test signal routing between Z-Wave switches and Zigbee sensors through your unified dashboard. Successful integration shows all devices responding within 500ms—critical for multi-protocol environments.
Exploring Practical Projects and Use Cases
Transform everyday routines with hands-free control and intelligent monitoring systems. These applications demonstrate how flexible setups can adapt to diverse needs while maintaining full local operation.
Smart Home Automation Ideas
Schedule lighting based on sunrise patterns or occupancy detection. Pair motion detectors with dimmable bulbs to illuminate pathways at night. Voice commands via platforms like Home Assistant let you adjust settings without touching a switch.
| Device Type | Trigger | Action |
|---|---|---|
| Smart Plug | Energy Price Drop | Activate Washer |
| Door Sensor | Open Garage | Turn On Lights |
| Thermostat | Indoor Temp ≥75°F | Start AC |
Environmental Monitoring Applications
Track air quality using particulate matter sensors that trigger air purifiers when pollution spikes. Combine humidity detectors with bathroom fans to prevent mold growth. Real-time dashboards display data trends across rooms.
One case study showed a 22% energy reduction by linking window contact sensors to climate controls. When windows open, thermostats pause heating/cooling cycles automatically. This integration eliminates wasted power while keeping interiors comfortable.
Enhancing Security and Integration
A robust automation system demands both ironclad security and seamless device teamwork. Your setup’s strength lies in protecting data flows while enabling diverse gadgets to collaborate effectively.
Security Best Practices for Your Offline Network
Start by hardening your defenses. Run sudo apt update && sudo apt full-upgrade weekly to patch vulnerabilities. These commands refresh system packages and close security gaps:
- Change default login credentials using
passwd - Configure UFW firewall to block unauthorized ports
- Enable AES-128 encryption for MQTT broker connections
| Firewall Rule | Port | Purpose |
|---|---|---|
| Allow | 1883 | MQTT communication |
| Deny | 22 | SSH from external networks |
| Allow | 80 | Local dashboard access |
Protocol Bridging and Device Compatibility
Mix Z-Wave devices with other standards using open-source bridges. Follow these steps:
- Verify firmware versions across all components
- Assign static IP addresses to critical hardware
- Test signal range between mixed-protocol sensors
This table shows key compatibility factors:
| Protocol | Max Range | Encryption |
|---|---|---|
| Z-Wave | 100m | AES-256 |
| Thread | 20m | DTLS |
Regularly audit communication logs to spot irregularities. Pair new hardware in isolated test environments before full integration.
Conclusion
Building your own independent automation system puts control back in your hands. Through careful hardware selection and platform configuration, you’ve created a responsive hub that works without internet dependence. Open-source tools like Home Assistant unite devices from various brands into one cohesive network.
Your setup now handles everything from lighting schedules to air quality tracking. Adjust smart bulbs based on daylight levels or trigger ventilation fans when humidity rises. These practical ideas demonstrate how automated systems simplify daily routines while conserving energy.
Security remains paramount in any offline network. Regular software updates and encrypted configuration files protect against vulnerabilities. Pair this vigilance with proper device placement for reliable signal strength across all rooms.
Ready to expand further? Experiment with advanced automation rules or integrate Z-Wave devices into your existing setup. Start small with basic lighting controls, then grow into multi-room environmental monitoring. Each upgrade strengthens your self-reliant ecosystem.
This approach future-proofs your investment while maintaining privacy. With a stable foundation and modular design, your system adapts as new technologies emerge. The journey from basic setup to advanced customization proves what’s possible when you own every aspect of your connected space.