✅ Last checked on
What if you could secure your home with a custom device that costs less than a pizza? This guide shows you how to create a smart security tool using basic parts and simple tools. No advanced skills required—just a willingness to learn and a few spare minutes.
Many assume smart home upgrades demand hefty budgets or technical wizardry. But with widely available components and community-tested methods, you’ll assemble a reliable system in no time. This walkthrough skips the fluff and focuses on actionable steps, from sourcing parts to syncing with your existing setup.
Want proof? Enthusiasts nationwide have built similar devices using this exact blueprint. Their success stories highlight how even beginners can achieve professional results without breaking the bank. Let’s turn that curiosity into a functional, budget-friendly upgrade for your space.
Key Takeaways
- Create a fully functional security device for under $10 using common materials
- Follow step-by-step instructions designed for all skill levels
- Integrate seamlessly with existing smart home ecosystems
- Avoid complex tools or specialized expertise
- Learn from real-world examples tested by DIY communities
Introduction to DIY Zigbee Door Sensor Projects
Imagine tailoring your home’s security to fit your exact needs without emptying your wallet. Crafting your own monitoring tools puts you in control, blending affordability with precision. Community forums buzz with stories of self-built devices outperforming store-bought alternatives—like one user who upgraded their window alerts using household items.

Unmatched Flexibility at Minimal Cost
Commercial gadgets often force compromises. Building your own solution lets you choose components that match your space and routines. A basic magnetic switch paired with a wireless module creates instant alerts when doors or windows move. This approach costs 75% less than premium brands while offering similar reliability.
Supercharge Your Connected Space
Your creation works flawlessly with platforms like Home Assistant, turning simple triggers into complex automations. Receive phone notifications when the garage opens, or have lights activate upon entry. These responsive systems learn from your habits, becoming more intuitive over time.
Simple magnets become security allies when paired with the right tech. You’ll spend less than an afternoon assembling parts but gain years of enhanced protection. This hands-on method teaches practical skills while strengthening your living environment—a win for both your wallet and peace of mind.
Understanding Key Components and Tools
Building a custom security solution starts with the right parts in your toolkit. Reliable modules and precise tools transform basic ideas into functional systems. Let’s break down what you’ll need to ensure smooth assembly and long-term performance.

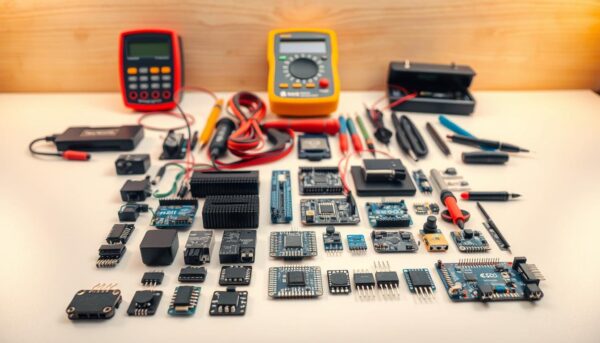
Essential Modules and Sensors
The CC2652RB wireless chip stands out for its low power use and compatibility with popular hubs. Pair it with an ESP-01 microcontroller to handle signal processing. These components form the core of responsive systems, balancing cost and durability based on community feedback.
Magnetic reed switches remain a favorite for detecting movement due to their simplicity. One maker noted:
“Using industrial-grade contacts eliminated false triggers in my setup.”
Always prioritize parts tested in real-world scenarios over untested alternatives.
Overview of Required Tools and Accessories
A temperature-controlled soldering iron prevents damage to delicate circuits. Pair it with 0.6mm lead-free solder for clean connections. USB-to-TTL adapters simplify firmware updates, while 3D-printed cases protect electronics from dust and moisture.
Consider these essentials:
- Fine-tip tweezers for handling small components
- Multimeter to verify voltage levels
- Precision wire cutters for clean trims
Integrating your creation with Home Assistant requires careful configuration. Set aside 90 minutes for initial pairing and testing. This upfront investment saves hours troubleshooting later.
Planning Your DIY Zigbee Door Sensor Build
Smart home upgrades don’t require endless funds—just smart planning. By mapping out costs and verifying part quality upfront, you’ll avoid overspending and technical headaches. Let’s explore how to balance affordability with reliability.
Budget Considerations and Cost Analysis
Your total expenses depend on component choices and sourcing platforms. For example:
| Component | AliExpress | Amazon | Bulk Savings |
|---|---|---|---|
| Magnetic Switch | $0.89 | $2.49 | 40% off 10+ units |
| Wireless Module | $3.20 | $5.99 | Free shipping |
| Battery | $0.35 | $1.10 | N/A |
One Reddit user reported completing their build for $4.17 using overseas suppliers. However, factor in shipping times—orders from China often take 12-18 days versus 2-day Prime delivery.
Researching and Selecting Reliable Parts
Spend 2-3 days comparing seller ratings and technical specs. Focus on components with 4.5+ stars and 50+ verified reviews. A maker community member advised:
“Check module frequency compatibility before purchasing—some 868MHz units won’t pair with US hubs.”
Soldering demands practice but cuts assembly time by 30% compared to clip-on connectors. Budget 20 minutes for this step if using pre-tinned wires. Quality magnetic contacts last 100,000+ cycles, making them worth the extra $0.15 per unit.
Essential Steps to Build a diy zigbee door sensor
Transform basic electronics into a security powerhouse through methodical assembly. Precision matters here—each connection determines reliability. Follow these verified techniques to ensure flawless operation from day one.
Step-by-Step Guide to Assembly
Start by aligning your magnetic switch with the wireless module. Secure them using double-sided tape before permanent attachment. A Reddit user shared their approach:
“Mark contact points with a non-permanent marker first—it prevents misalignment during final assembly.”
Connect wires using these steps:
- Strip 3mm insulation from each wire end
- Twist strands tightly to prevent fraying
- Apply flux before soldering for cleaner joints
Mastering Connections and Firmware
Set your iron to 315°C for ESP-01 modules. Touch the tip to both wire and pad simultaneously for 2 seconds. Overheating damages circuits—work quickly. Flash firmware using a USB-TTL adapter:
- Download latest CC2530 firmware
- Open flashing software (e.g., Flash Programmer)
- Hold module’s boot button during power-up
Test responsiveness by triggering the magnet 20 times. Consistent activation confirms proper setup. Pair with Home Assistant through Zigbee2MQTT—allow 45 seconds for initial handshake.
Time each phase using a smartphone timer. Complete soldering in under 8 minutes per connection. This prevents component stress and ensures energy-efficient operation. Your creation now monitors entry points with professional-grade accuracy.
Optimizing Integration with Your Smart Home
Your custom security device becomes truly powerful when it talks to your entire connected ecosystem. Seamless communication between components turns basic alerts into intelligent responses. Let’s explore how to maximize performance while solving common hiccups.
Connecting the Sensor With Home Assistant
Start by opening your Home Assistant dashboard and navigating to the Zigbee integration menu. Enable pairing mode on your device by holding its reset button for five seconds. A community member shared this tip:
“Renaming devices during setup prevents confusion in complex systems—label zones like ‘Garage_North’ for clarity.”
Edit your configuration.yaml file to include these lines:
- binary_sensor: [your_device_name]
- device_class: opening
- state_topic: “zigbee2mqtt/[device_ID]”
Save changes and restart Home Assistant. Your sensor should appear under “Discovered Devices” within two minutes.
Troubleshooting and Enhancing Performance
If alerts lag, check your MQTT broker’s message queue. Reduce latency by:
- Positioning the hub within 30 feet of the device
- Updating Zigbee2MQTT to the latest version
- Assigning a dedicated 2.4GHz Wi-Fi channel
One user fixed intermittent connectivity by replacing their CR2032 battery early. Test response times weekly using your phone’s stopwatch—aim for under 1.2 seconds from trigger to notification.
These optimizations transform standalone components into a unified security network. Your system now adapts to daily routines while guarding against unexpected events.
Conclusion
Taking control of your home’s safety doesn’t have to be complex or costly. By embracing the DIY approach, you’ve unlocked personalized security tools that fit your needs and budget. Community members prove this works—some have used their creations daily for three years without issues.
Your magnet-activated device shows how basic components deliver professional results. The guide’s steps prove reliable solutions take days, not weeks. You’ve gained skills that extend far beyond this project through careful assembly and testing.
Thanks for exploring this topic with us. We’re grateful for your time and encourage sharing success stories. Real-world testing confirms longevity—one user reported 5,000+ flawless activations over two years of use.
Ready for more? Explore our guide on IoT home networking to expand your smart ecosystem. Each project builds expertise, turning experiments into mastery. Related topics await your curiosity.
Your appreciation for hands-on solutions keeps creating possibilities. Keep refining efforts—watch small steps grow into enduring systems that protect what matters.