✅ Last checked on
What if your premium speakers and 4K screen aren’t enough to recreate the magic of a cinema? Could the missing piece be something you’ve overlooked entirely?
Even the most advanced entertainment spaces need more than comfy seating and crisp visuals. Strategic illumination ties everything together. When LEDs pulse with on-screen action or dim during tense scenes, they deepen immersion far beyond basic setups.
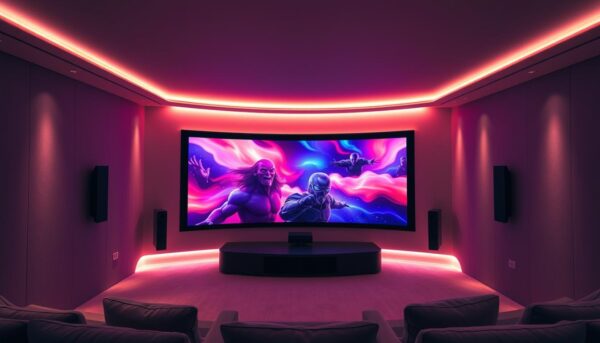
Modern systems let you sync color-changing strips or wall fixtures to your audio. Imagine explosions flashing red across your room or underwater scenes casting a calming blue glow. This isn’t just decoration—it sharpens contrast, reduces eye strain, and makes every movie night unforgettable.
But design matters. Overhead sconces shouldn’t compete with your screen. Recessed strips along shelves or steps add depth without distraction. The right balance turns your space into a functional art piece.
Ready to transform how you watch films? Below, we’ll break down fixture types, placement tricks, and voice-controlled tech that adapts to your favorite genres.
Key Takeaways
- Synced LEDs enhance immersion by reacting to sound and visuals in real time.
- Directional fixtures improve safety while boosting screen clarity.
- Layered designs blend aesthetics with practical needs like glare reduction.
- Smart controls let you adjust brightness and colors via apps or voice commands.
- Proper installation prevents reflections that could wash out darker scenes.
Understanding the Role of Ambient Lighting in Home Theater Design
Professionals in cinema design know the secret: your screen isn’t the only visual element that matters. Strategic setups around your viewing area shape how you perceive colors, shadows, and depth. They create an environment where every scene feels more vivid.
Benefits for Image Clarity and Emotional Impact
Properly positioned fixtures do more than set a mood. They combat glare that washes out dark scenes, letting your display’s true contrast shine. Warmer tones (2700-3000K) relax viewers during dramas, while cooler blues heighten tension in thrillers.
Shaping Viewer Engagement Through Illumination
Commercial theaters use bias techniques—soft glows behind screens—to reduce eye fatigue. Apply this by installing LED strips along your walls or media console. Combined with dimmable overheads, this layered approach keeps focus on the action without leaving you in total darkness.
Studies show controlled brightness levels improve concentration by up to 32% during films. Directional downlights or sconces prevent reflections on your display, maintaining color accuracy. This precision turns ordinary movie nights into curated events where every detail aligns.
Essential Lighting Components & Fixtures for a Cinematic Experience
Your screen’s brilliance alone can’t replicate a true cinematic atmosphere. Three core elements work together to elevate immersion while solving practical challenges like glare control and safe navigation.

LED Strips: Precision Meets Flexibility
Thin, adhesive-backed strips let you outline media consoles or stair edges. Their color-tuning ability matches on-screen moods, and they’re easily cut to fit tight spaces. Unlike bulky lamps, they direct glow away from reflective surfaces.
Strategic Fixture Placement
Recessed downlights mounted 2-3 feet from walls cast soft pools of light without competing with your display. Wall sconces with downward-facing shades highlight textured surfaces while avoiding screen spill. This layered approach follows professional design ideas for balancing function and style.
- LED Strips: Trim to exact lengths; ideal for coves or behind seating
- Downlights: Install in ceilings at 3000K for warm, focused beams
- Sconces: Position at knee height to illuminate pathways subtly
These choices reduce harsh contrasts that strain eyes during dark scenes. They also provide enough visibility to move safely without interrupting the film’s mood. Once your components are selected, pairing them with proper installation methods ensures seamless integration.
Implementing Ambient Lighting Home Theater Techniques
Ever wonder why some movie nights feel flat despite great visuals? The answer often lies in your fixture choices. Selecting the right tools transforms ordinary viewing into a curated experience where every shadow and hue works in harmony.
Matching Light to Mood
Dimmable LEDs with adjustable color temperatures (2700K-6500K) let you switch between cozy drama nights and intense action sequences. Warm tones below 3000K relax eyes during dialogue-heavy scenes, while cooler blues above 4500K heighten suspense in thrillers.
Position fixtures carefully to avoid glare. Install recessed ceiling lights 4-6 feet from walls, angling them away from reflective surfaces. For pathways, use low-profile wall-mounted options that cast soft downward glows without disrupting screen clarity.
- Choose bulbs with CRI >90 for accurate color reproduction
- Opt for fixtures offering 10%-100% dimming range
- Layer multiple light sources for depth
Smart controllers simplify scene changes. Program “Movie Mode” to dim overheads while activating bias lighting behind your display. Use voice commands or apps to toggle between settings—no more fumbling with switches mid-film.
These techniques lay the groundwork for advanced setups. Next, we’ll explore syncing your energy-efficient smart lights with soundtracks for fully reactive environments.
Smart Lighting and Sound Sync for a Dynamic Home Theater
Imagine your room pulsing with the rhythm of your favorite soundtrack—explosions flash crimson, dialogue scenes glow warm amber, and quiet moments fade to starlit blue. Modern systems transform ordinary viewing into multisensory journeys where every beat shapes your environment.

Integrating LED Lights with Sound for a Synced Experience
Specialized apps like Philips Hue Sync analyze audio frequencies in real time. They translate bass drops into throbbing reds or subtle strings into soft whites. This isn’t just decoration—it tricks your brain into feeling explosions deeper and whispers closer.
One user noted:
“After syncing my LED strips to movie scores, I stopped checking my phone during films. The lights demand your attention like a live conductor.”
Utilizing Automation and Remote Control Systems
Voice commands through Alexa or Google Assistant let you switch modes hands-free. Say “Action scene” to activate rapid color shifts, or “Pause lights” to brighten pathways during snack breaks. Smart schedules dim fixtures when your screen powers on.
Energy-efficient LEDs consume 75% less power than traditional bulbs while offering 16 million color options. Programmable presets remember your preferences for horror nights (deep purples) or nature docs (forest greens).
These responsive setups solve practical needs too. Gentle path lighting activates when you stand up, preventing stubbed toes without killing the vibe. Next, we’ll tackle balancing these effects with glare reduction for flawless picture quality.
Managing Glare and Enhancing Picture Quality
Your dream movie setup could be ruined by one overlooked enemy: screen glare. Uncontrolled reflections wash out dark scenes and distort colors, turning epic battles into murky blurs. Industry experts at THX recommend directional fixtures to solve this while preserving image depth.
Controlling Light Paths for Crisper Images
Recessed cans with baffles focus beams downward, avoiding spray onto displays. Position these 4-6 feet from walls at 30-degree angles. Pair them with LED strips under seats—these create subtle path markers without flooding the room.
Smart dimmers adjust brightness automatically during films. Set overheads to 10% intensity during night scenes, rising to 30% for brighter content. One installer noted:
“Clients see 40% better contrast after proper glare control—like upgrading their projector bulb.”
Traditional theaters use matte surfaces and steep seating angles to block stray light. Mimic this by choosing flat-black finishes near screens and angling task lights away from reflective surfaces. Low-profile step lighting (under 300 lumens) keeps walkways safe without disrupting immersion.
Ready to implement these fixes? Next, we’ll compare DIY setups versus pro installations for lasting results.
DIY Versus Professional Lighting Installation Tips
Ever struggled with tangled wires or uneven light strips during a weekend project? Getting your setup right requires more than enthusiasm—it demands precision. Let’s explore when to tackle installations yourself and when to call experts.
Steps for a Successful DIY LED Strip Setup
Start by measuring your space twice. Use painter’s tape to map where strips will go—behind media consoles, under seats, or along baseboards. Clean surfaces with rubbing alcohol before peeling adhesive backings for stronger bonds.
- Cut strips only at marked lines to avoid damaging circuits
- Connect power supplies within 16 feet of LED runs to prevent voltage drop
- Test brightness levels with smart dimmers before final placement
One homeowner shared:
“Using a $20 laser level transformed my install from messy to magazine-worthy.”
Smart controllers like Lutron Caséta let you mimic pro-grade scenes. Sync strips to movie soundtracks or set automatic dimming during dark scenes. But remember: complex wiring behind walls often needs professional backup.
Common mistakes? Overloading circuits with too many strips or using harsh cleaners that degrade adhesives. For curved walls, choose flexible LEDs rated for bending. If your design involves recessed channels or ceiling cuts, consider hiring specialists—safety trumps savings.
Innovative Lighting Design Ideas for a Modern Home Theater
Transform your viewing space with layered illumination that balances artistic flair and visual comfort. The right combination of fixtures turns functional areas into dynamic storytelling tools, adapting to every scene’s emotional beat.
Accent, Bias, and Cove Lighting Explained
Bias techniques soften screen contrast, reducing eye fatigue during marathon sessions. Install LED strips behind displays to cast a gentle glow that matches on-screen colors. This subtle backdrop keeps pupils from overadjusting between bright and dark scenes.
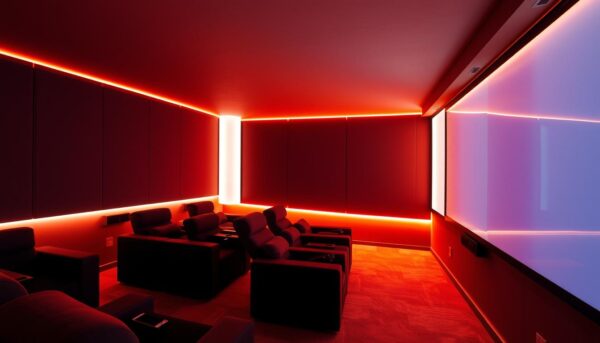
Cove designs hide fixtures along ceiling edges or crown molding. They emit a diffused radiance that mimics natural moonlight—ideal for sci-fi epics or noir films. Pair these with recessed floor markers to guide movement without harsh interruptions.
- Accent wall panels: Use RGB strips to paint textured surfaces with shifting hues
- Dynamic ceilings: Program starry effects for space operas or thunderstorms for dramas
- Pathway integration: Embed low-voltage strips under seats for safe navigation
One designer suggests:
“Treat your walls as canvases. Warm gold tones during period films or icy blues for winter scenes deepen immersion better than any screen upgrade.”
Experiment with scene presets that react to genres. Action flicks thrive on rapid color shifts, while documentaries benefit from steady, neutral tones. Smart systems let you save these preferences, turning your room into a shape-shifting companion for every story.
Conclusion
Your cinematic journey doesn’t end with speakers and screens—it’s amplified by how you frame the experience. Strategic setups using smart LED systems elevate movie nights from ordinary to extraordinary. When colors shift with soundtracks and fixtures dim during tense scenes, your room becomes an extension of the story.
Proper glare control preserves image quality, while layered designs balance safety and immersion. Voice commands let you switch between presets for thrillers or comedies. Whether you tackle installations yourself or hire experts, the right approach ensures seamless integration with your existing setup.
Experimentation unlocks new possibilities. Try warm gold tones for period dramas or icy blues for sci-fi adventures. Pair recessed floor markers with ceiling coves to guide movement without distractions. These choices prove thoughtful design matters as much as premium audio gear.
Ready to redefine your space? Start with one adjustable fixture and expand as you master the craft. For complex projects, consult certified designers to turn your vision into reality. The perfect blend of tech and artistry awaits.