✅ Last checked on
What if the key to unlocking ironclad server security isn’t a complex firewall or a pricey tool—but a protocol you’ve overlooked? The answer lies in a technology that’s been quietly safeguarding remote connections for decades while remaining indispensable for modern IT workflows.
Secure Shell (SSH) has transformed how professionals interact with servers. Unlike outdated methods like FTP or Telnet, this protocol encrypts every command and file transfer, shielding your data from prying eyes. Whether you’re managing cloud infrastructure or automating tasks, understanding SSH is non-negotiable for maintaining airtight security.
This guide walks you through SSH essentials, from establishing your first encrypted connection to advanced configurations. You’ll learn how to replace risky password logins with secure remote server access via cryptographic keys and discover tools like SCP for safe file transfers across operating systems.
Key Takeaways
- Encrypts all communication between devices, protecting sensitive data during transfers
- Replaces insecure legacy protocols like Telnet and FTP with modern encryption
- Supports multiple authentication methods, including passwordless key-based logins
- Works seamlessly across Linux, Windows, and macOS with free open-source tools
- Enables secure file management through built-in utilities like SFTP and SCP
Understanding SSH: The Secure Shell Protocol
Behind every secure server interaction lies a protocol that revolutionized digital communication. This system encrypts data transfers and remote commands while offering multiple ways to verify user identities. It’s become the standard for managing everything from cloud servers to automated workflows.
What Is This Protocol and Why It Matters
The tool creates a protected channel between devices using advanced encryption like AES-256. Unlike older methods that exposed login details, it scrambles every keystroke and file transfer. You get three main ways to prove your identity: passwords, cryptographic keys, or multi-factor setups.
From Risky Logins to Encrypted Solutions
Before 1995, technicians used protocols that sent passwords as readable text. Hackers could snatch credentials mid-transfer. The new method replaced these vulnerabilities with layered protection—encrypting data and validating devices before allowing access.
Core Advantages for Modern Operations
This approach offers more than just privacy. Port forwarding lets you safely reach services behind firewalls. Built-in file transfer tools eliminate the need for separate insecure apps. Automation-friendly key systems simplify managing hundreds of servers while keeping permissions airtight.
How SSH Works: The Technical Foundation
Imagine a digital conversation where every word gets scrambled before leaving your device. That’s the core principle behind secure remote access. The system uses a three-layer architecture to protect data while maintaining flexibility for different tasks.
The Client-Server Model Explained
Your computer acts as the client, initiating contact with the server through port 22. During this handshake, both devices negotiate encryption standards using methods like Diffie-Hellman. This creates a shared secret key that locks down all subsequent communication.
The server proves its identity first using cryptographic fingerprints. Once verified, your credentials get encrypted before transmission. This layered verification prevents “man-in-the-middle” attacks that compromised older protocols.
Protocol Versions and Architecture
Modern implementations rely on SSH-2, which fixed critical flaws in the original version. The upgraded protocol introduced:
- Strict encryption standards (AES, ChaCha20)
- Enhanced key exchange algorithms
- Support for multiple parallel sessions
Three distinct layers work together like a security assembly line. The transport layer establishes the encrypted tunnel. The authentication layer verifies user identities through passwords or keys. Finally, the connection layer manages data channels for file transfers or command execution.
Setting Up SSH on Your System
Getting started requires three key steps: installing the software, adjusting client settings, and hardening your server. Each operating system handles setup differently, but the core principles remain consistent across platforms.
Installing Across Operating Systems
Windows users enable the feature through Settings > Apps > Optional Features. Linux distributions typically include pre-installed tools, while macOS requires enabling remote login in Sharing preferences. Verify installation by typing ssh -V in your terminal.
Client Customization Basics
Edit the ~/.ssh/config file to create shortcuts for frequent connections. Assign aliases to servers using specific ports or key files. This saves time when managing multiple systems.
Server Protection Strategies
Modify the /etc/ssh/sshd_config file to enhance security. Use these settings for optimal protection:
| Setting | Default | Recommended | Purpose |
|---|---|---|---|
| Port | 22 | Custom value | Reduce brute-force attempts |
| PermitRootLogin | yes | no | Block direct root access |
| PasswordAuthentication | yes | no | Enforce key-based logins |
After updating configurations, restart the service using sudo systemctl restart sshd. Always test changes from a secondary connection before closing your current session.
SSH Authentication Methods
Protecting server access starts with choosing the right verification process. Three primary approaches balance convenience and protection, each offering distinct advantages for different workflows.
Password-Based Verification
This traditional method requires users to enter a secret phrase. While simple to implement, it’s vulnerable to brute-force attacks if weak passwords are used. Always combine with other security measures for better protection.
Cryptographic Key Validation
Key pairs provide stronger security than passwords. Your system stores a private key while the server holds a public version. Government agencies often enhance this method using tamper-proof smartcards like CAC/PIV for physical key storage.
“Automation thrives on key-based authentication – it enables secure scripted tasks without human intervention.”
Layered Security Options
Multi-factor authentication (MFA) combines verification elements for heightened protection. Popular configurations include:
| Method | Security Level | Use Case |
|---|---|---|
| Password + YubiKey | High | Corporate servers |
| Public Key + Google Auth | Medium-High | Developer workstations |
| Smart Card + PIN | Maximum | Government systems |
Pluggable Authentication Modules (PAM) let you integrate time-based codes from apps like Google Authenticator. This approach ensures attackers need multiple compromised elements to breach your defenses.
Creating and Managing SSH Keys
Your digital identity hinges on cryptographic keys that unlock server access without passwords. Proper key management ensures secure automation while preventing unauthorized entry. Let’s explore how to generate, protect, and deploy these essential credentials.
Generating Your SSH Key Pair
Start by creating a key pair using the ssh-keygen command. Choose modern algorithms like ed25519 for stronger security. The tool creates two files: a private key (keep this secret) and a public key you’ll share with servers.
Managing Passphrases
Add a passphrase when generating keys for extra protection. Use ssh-agent to store unlocked keys temporarily, avoiding repeated passphrase entries. For high-security environments, consider hardware tokens like YubiKeys to safeguard private files.
Distributing Your Public Keys
Deploy public keys using ssh-copy-id user@hostname for quick setup. This command handles file permissions and updates the server’s authorized_keys list automatically. If the utility isn’t available, manually append your key using:
cat ~/.ssh/id_rsa.pub | ssh user@host "mkdir -p ~/.ssh && cat >> ~/.ssh/authorized_keys"
For managing multiple servers, tools like Ansible ensure consistent key distribution. Always test access before disabling password logins, and audit authorized_keys files regularly to remove unused entries.
Establishing Your First SSH Connection
Initiating your maiden voyage into remote server management begins with a simple command. Type ssh username@hostname in your terminal, replacing “username” with your account and “hostname” with the server’s IP or domain. This starts an encrypted handshake that protects your login details and commands.

Basic Connection Syntax
Use these variations depending on your setup:
ssh -p 2222 admin@myserver.comfor custom portsssh -i ~/.ssh/custom_key.pem user@10.0.0.1for key-based access
The system will prompt you to verify the host’s identity before proceeding. This step ensures you’re not connecting to an imposter server.
Host Verification Essentials
Your first connection attempt triggers a security checkpoint. The terminal displays a warning like this:
The authenticity of host '192.168.1.5' can't be established.

ECDSA key fingerprint: SHA256:Abc123...xyz789

Are you sure you want to continue (yes/no)?
Confirm only after cross-checking the fingerprint with your server administrator. Once approved, the host’s key gets stored in ~/.ssh/known_hosts for future reference.
Changed server keys? Remove outdated entries using ssh-keygen -R hostname. For teams, maintain a verified key database to prevent mismatches. Adjust these settings in your config file:
| Option | Behavior |
|---|---|
| StrictHostKeyChecking yes | Blocks connections to unknown hosts |
| StrictHostKeyChecking no | Auto-accepts all fingerprints (risky) |
| StrictHostKeyChecking ask | Default – prompts for confirmation |
Essential SSH Commands and Usage
Mastering remote server management requires knowing the right tools for every task. These commands let you securely access systems, transfer files, and automate workflows without compromising safety. Below are vital tools to streamline your operations.
Start with the basic connection: ssh user@hostname opens an encrypted shell session. Need to run a quick task? Append your command in quotes to execute it instantly: ssh user@host "systemctl restart nginx".
Transfer files efficiently with these options:
| Command | Purpose | Example |
|---|---|---|
| scp | Single-file transfers | scp -C backup.tar.gz user@host:/backups |
| rsync | Sync directories | rsync -avz -e ssh ./project/ user@host:/opt/ |
| sftp | Interactive transfers | sftp user@host |
Manage keys effortlessly with ssh-keygen -t ed25519 for secure key generation. Deploy public keys using ssh-copy-id or troubleshoot connections with ssh -vvv for detailed logs. For multi-server setups, create shortcuts in your ~/.ssh/config file to save time.
Automate securely by combining these tools with agents like ssh-add. Test configurations with ssh -T hostalias before scripting critical tasks. This approach keeps your workflows fast and protected.
Securing Your SSH Implementation
Locking down remote access requires more than just strong passwords—it demands strategic configuration choices. Proper setup reduces attack surfaces while maintaining workflow efficiency. Let’s explore critical hardening techniques every system administrator should implement.
Disabling Password Authentication
Switch to key-based logins to eliminate brute-force risks. Edit your server’s sshd_config file and set PasswordAuthentication no. This forces users to employ cryptographic keys, which are exponentially harder to compromise than text-based credentials.
Changing Default Ports
Move services away from port 22 to sidestep automated scans. Choose a port between 1024-65535 and update both server and client configurations. While not foolproof, this simple change drastically reduces random attack attempts.
Implementing Access Controls
Restrict server access using these settings:
AllowUsers yourusername– Whitelist authorized accountsPermitRootLogin no– Block direct root accessMaxAuthTries 3– Limit failed login attempts
Using Configuration Files Securely
Customize connections through ~/.ssh/config while maintaining strict file permissions. Set user-specific files to 600 and system-wide configurations to 644. Always use HashKnownHosts yes to obscure server identities in logs.
“Configuration files are powerful tools—but mishandled permissions turn them into security liabilities.”
Audit your setup quarterly. Remove outdated keys and verify that automated tools like Fail2ban actively block suspicious activity. These layered defenses create multiple barriers against unauthorized access.
SSH Port Forwarding and Tunneling
Ever needed to secure all your internet traffic through a single encrypted tunnel? Port forwarding techniques let you redirect network traffic securely, acting as a digital bridge between devices. These methods range from simple port redirections to full application-level encryption.

Local vs. Remote vs. Dynamic
Each forwarding type serves different needs:
| Type | Syntax | Use Case |
|---|---|---|
| Local | ssh -L 8080:localhost:80 user@server |
Access internal web servers |
| Remote | ssh -R 9000:localhost:3000 user@server |
Expose local dev environments |
| Dynamic | ssh -D 1080 user@server |
Secure web browsing on public Wi-Fi |
Dynamic SOCKS Proxy Setup
Dynamic forwarding creates a smart tunnel for multiple apps. Run ssh -D 1080 yourname@example.com to establish a SOCKS proxy on port 1080. Configure your browser or email client to use this proxy for encrypted traffic routing.
Key advantages include:
- Works with any SOCKS-compatible software
- Encrypts data on untrusted networks
- Uses compression (
-Cflag) for slower connections
This method differs from traditional VPNs by letting you choose which apps use the tunnel. For detailed configuration steps, explore this port forwarding guide to master advanced setups.
File Transfers Using SSH
Need to move files securely between systems without exposing sensitive data? Encrypted transfer protocols built into your remote access toolkit handle this with military-grade protection. These tools turn risky file exchanges into bulletproof operations.
Secure Copy Protocol (SCP)
SCP uses simple commands for quick transfers. The syntax scp file.txt user@host:/path pushes local files to remote systems. For downloads, reverse the arguments. While efficient, SCP lacks features like transfer resumption or directory syncing.
SSH File Transfer Protocol (SFTP)
SFTP offers interactive file management through a shell-like interface. Start sessions with sftp user@host, then navigate using familiar commands:
| Command | Action | Example |
|---|---|---|
| get | Download file | get report.pdf |
| put | Upload file | put backup.zip |
| reget | Resume download | reget largefile.iso |
Automate transfers using script files with SFTP commands. Run sftp -b tasks.txt user@host to execute multiple actions. Graphical tools like WinSCP provide drag-and-drop functionality while maintaining encryption.
Automating Tasks with SSH
Streamline server management by turning repetitive tasks into one-click operations. Secure shell’s scripting capabilities let you execute commands across multiple systems while keeping authentication seamless. This approach reduces human error and accelerates workflows through standardized processes.
Creating SSH Scripts
Build time-saving scripts using simple bash commands. A basic update script might look like this:
#!/bin/bash

ssh user@host "sudo apt update && sudo apt upgrade -y"
Chain commands across servers using parallel SSH tools. For complex workflows, combine with cron jobs to schedule nightly backups or security scans automatically.
Using SSH Agents
Agents handle decrypted keys in memory, eliminating constant passphrase prompts. Start the service with:
eval $(ssh-agent)
Add your identity file once using ssh-add ~/.ssh/id_rsa. The system remembers it until you close the terminal session. For enhanced network security best practices, set temporary access windows with ssh-add -t 3600 to expire keys after one hour.
“Agent forwarding unlocks next-level automation—access nested servers without storing keys everywhere.”
Enable forwarding cautiously with ssh -A when jumping between trusted systems. Always audit remote servers before using this feature, as compromised machines could misuse your credentials.
Troubleshooting Common SSH Issues
Why does your secure connection suddenly refuse to work? Most access problems stem from three areas: network hiccups, credential mismatches, or permission slip-ups. Let’s break down solutions for the most frequent headaches you’ll encounter.
Connection Problems
Can’t reach your server? First, check if the machine is online using ping or cloud dashboard tools. Verify port 22 access with nmap -p 22 hostname. If blocked, review firewall rules and ensure the SSH service runs with systemctl status sshd.
Changed your default port? Update client commands with -p [port_number]. For “Connection timed out” errors, test network paths and confirm security groups allow your IP address.
Authentication Failures
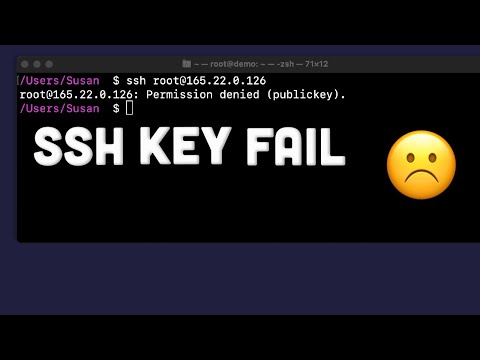
“Permission denied” messages often mean key mismatches. Confirm your public key exists in the server’s authorized_keys file. Convert PuTTY’s .ppk files to OpenSSH format if switching clients.
Check file ownership – your user must own both keys and the ~/.ssh directory. Use ssh -vvv to see exactly where handshakes fail. This reveals if the server rejects your key or never receives it.
Permission and Key Problems
SSH enforces strict file protections. Set these permissions:
chmod 700 ~/.ssh(directory)chmod 600 ~/.ssh/id_rsa(private key)chmod 644 ~/.ssh/authorized_keys(server file)
Group-writable home directories trigger security blocks. Fix with chmod g-w ~. For stubborn issues, regenerate keys using ssh-keygen -t ed25519 and redistribute them to all machines.
Conclusion: Embracing SSH for Secure Server Management
In an era where cyber threats constantly evolve, safeguarding your digital infrastructure demands tools that combine reliability with robust protection. Secure shell technology has redefined remote server access by encrypting every interaction—from command execution to file transfers. Its public-key authentication system eliminates risky password dependencies, a critical defense since home network security best practices show 80% of breaches involve stolen credentials.
Adopting key-based authentication isn’t optional—it’s essential. With 92% of tech firms relying on open-source implementations, the protocol’s adaptability across operating systems ensures seamless integration into existing workflows. Whether managing cloud servers or automating tasks, this method offers military-grade encryption without sacrificing efficiency.
Regular audits and policy updates keep your defenses sharp. Rotate keys quarterly, disable unused accounts, and monitor access logs. Remember: security isn’t a one-time setup but an ongoing commitment. By mastering these techniques, you create a fortress around your servers while maintaining the flexibility modern operations require.